27 February 2021
15 February 2021
My Monday Making: Valentine's decorations
Hello! Monday is always such a difficult day for me... Its the first day of the week, where I have to prepare for a hard working week as also finishing up some chores left from the weekend. And this weekend was a special one, as we celebrated Valentine's! I decided that this valentine's would be a family event, where we would celebrate the love we feel for each other. So I tried to make it special for everyone, and make it special for the little kiddos particularly. Once again I went all out with decorations and a lot of baking! The kiddoes do enjoy it, and... I think they are starting to expect it, as they are becoming a biiitttt demanding... lol! More on that later....
Our lunch was special , and I baked a hear dessert for it. I followed this recipe here, for a layered Brownie Heart Dessert.
I started by baking two heart shaped brownies:
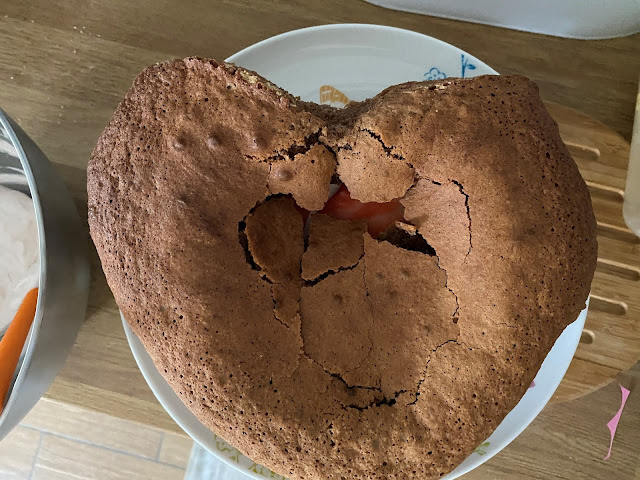
This is what they looked after baked, quite cute, when removing the brownie from the foil goes well! My second brownie was not that good looking....
I then made the strawberry cream... Look at those gorgeous colours!
And spread it over the brownie.
Then its all about strawberries!
And here goes the second brownie. As you can see it fell apart, but I was able to cover the hole with strawberry cream.
and it looked good ... and very tasty in the end:
Making the decorations was the fun part. I made a lot of heart banners and also a big heart to hang. For this I used my stash of tissue paper I had. I used different tones of pink to make an Ombre effect. Kiddos started by helping me, but then got bored!
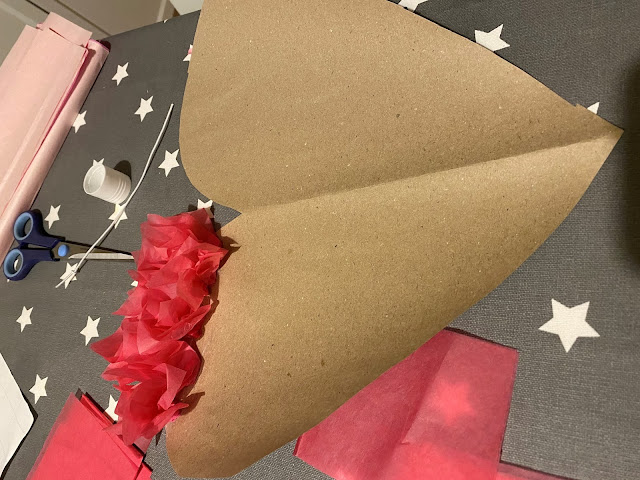
I began by cutting squares of tissue paper, and glue with a regular glue stick. I chose to use the darker pink tones first, and then ended up with the lighter pink shade.
The brown paper I am using is the rolls of wrapping paper I have around. I am always saving paper for this little experiments. Everything can have a second, third and fourth lives! I also used this paper to wrap the Valentines gifts. I did forget to take pictures! Next time I will remember to take some...
And this is how the heart ended up:
I cut a lot of little hearts to make the bunting. I made 3d heart bunting for this, so very easy to do! I will later share a tutorial. Its does take a lot of hearts to cut out, but that can be a task that you can share with your little guys!
I also made a banner saying 'Be my Valentine'.... And little fan! yes, I have a lot of pink paper around... Not so much now as I used a lot of pink for Valentine's!
And for snacks I also made some cupcakes and merengue... Cupcake toppers were obligatory!
My oldest when saw the cupcakes asked 'Are this valentine's cupcakes?'... I answered, 'Yes, honey, they are!' ... and he replies: 'So why are they not heart shaped??' LOL! Very demanding little fellow....!
I hope you enjoyed a lovely Valentine!
xx
13 February 2021
07 February 2021
My Monday Making: A bird automata!
Hello everyone! I hope this post finds everyone in good health, both mental as physical... and that everyone is keeping themselves safe. Uow, what crazy times we are living, never ever have I imagined that in 2021 posts of mine would start this way. But this is still our covid's reality.
It has been a long time since I have last published a post about our little makings around the house. Have to say that with lockdown, I have never been so busy and lacking time to do anything. My sewing machine is closed up in a cupboard. And, being completely honest is not as I have the right mind frame be sewing properly . And since I have little people to keep entertained, any makings have to involve tiny hands, and be fun!
I have come across an amazing whale automata when browsing the internet for ideas:
Yes, this at some point will be something for us to make, but.... not in the foreseeable future!
I had to search for something more feasible for us to make. Much easier to do as well! So more browsing and I found this tutorial at a great website for automata, Rob Ives .
The tutorial I chose to use was this one, for a cork bird. So .... we started to make this little guy! We begun by gathering all the materials. We have a lot, and I mean a lot of corks in our home (not sure why... do we have someone who really loves red wine??). As I am always printing articles and so on, we have a lot of paper clips. We just had more difficulties finding foam, as it was spread in different places, kiddos love to find new spots to stash their craft materials. You can also use card for the bird body really, but since we had leftovers of foam, we chose that material instead of card.
Cutting the materials for the bird body was easy. I did made the hole on the cork, which is very straightforward to do. The bit that was really difficult for us (particularly for the big kiddo, although he had fun using mummy's tools) was straight the paper clips, and even more difficult to fold these at the correct angles, as you can see below:
In this image big kiddo is trying to shape the crank. He started shaping the angles, and I finished as the best I could. Not the most easier task even for mummy!
This image shows another step, inserting the legs in the birds body.
The bird final look! A bit different from what it was suppose to look lol
And here is the bird finally attached to the cork:
But the good part is, even if you get clumsy angles or not straight at all legs, the bird still moves, although in a really funny manner!
It really did not matter if we did not managed a perfect bird, but making this little guy kept us busy, and the kiddos still enjoyed playing with it.
Let's see if I can start posting more regularly. No promises though, as finding some free time with home-schooling is not easy. I hope this post gets you some inspiration to spend time at home with kids! Share some ideas below, I would love to hear from you.
xx
Labels:
crafts,
DIY,
indoor fun,
kids activities,
Monday making
06 February 2021
Subscribe to:
Posts (Atom)


